🛠️Installation#
Prerequisites#
Below table shows the recommended (tested) requirements of the computer for running this framework.
Component |
Recommended (Tested) |
|---|---|
CPU |
Intel Core i9 |
GPU |
RTX 3080 10GB |
OS |
Ubuntu 22.04 |
Python |
>=3.8 |
Nvidia Driver |
>=570 |
LeggedGym-Ex incoporates two simulators into one framework. One can choose either simulator to use, with each simulator requiring a seperate conda environment due to the limitation of python versions. Below is the recommended (tested) environment setting for two simulators:
Component |
IsaacGym |
Genesis |
IsaacSim |
|---|---|---|---|
Python |
3.8 |
>=3.10 |
>=3.10 |
Nvidia Driver |
570 |
570 |
570 |
PyTorch |
2.4.1+cu121 |
2.8.0+cu126 |
2.7.0+cu128 |
Direct Installation#
IsaacGym#
# 1. Create a conda environment with python3.8
conda create -n lr_gym python=3.8
conda activate lr_gym
# 2. Install Pytorch
pip install torch==2.4.1 torchvision==0.19.1 torchaudio==2.4.1 --index-url https://download.pytorch.org/whl/cu121
# 3. Download IsaacGym Preview4 under /home/username
cd /home/username
wget https://developer.nvidia.com/isaac-gym-preview-4 \
&& tar -xf isaac-gym-preview-4 \
&& rm isaac-gym-preview-4
# Substitute np.float with np.float32 to resolve compatibility
find isaacgym/python -type f -name "*.py" -exec sed -i 's/np\.float/np.float32/g' {} +
# Install isaacgym in this environment
cd isaacgym/python && pip install -e . && cd ../..
# 4. Install LeggedGym-Ex with isaacgym
git clone https://github.com/lupinjia/LeggedGym-Ex.git
cd LeggedGym-Ex && pip install -e ".[isaacgym]"
# 5. Test the installation
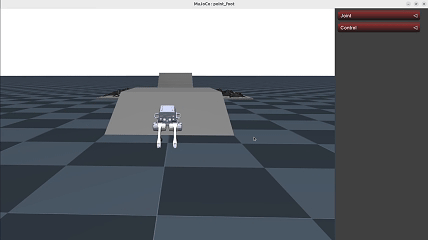
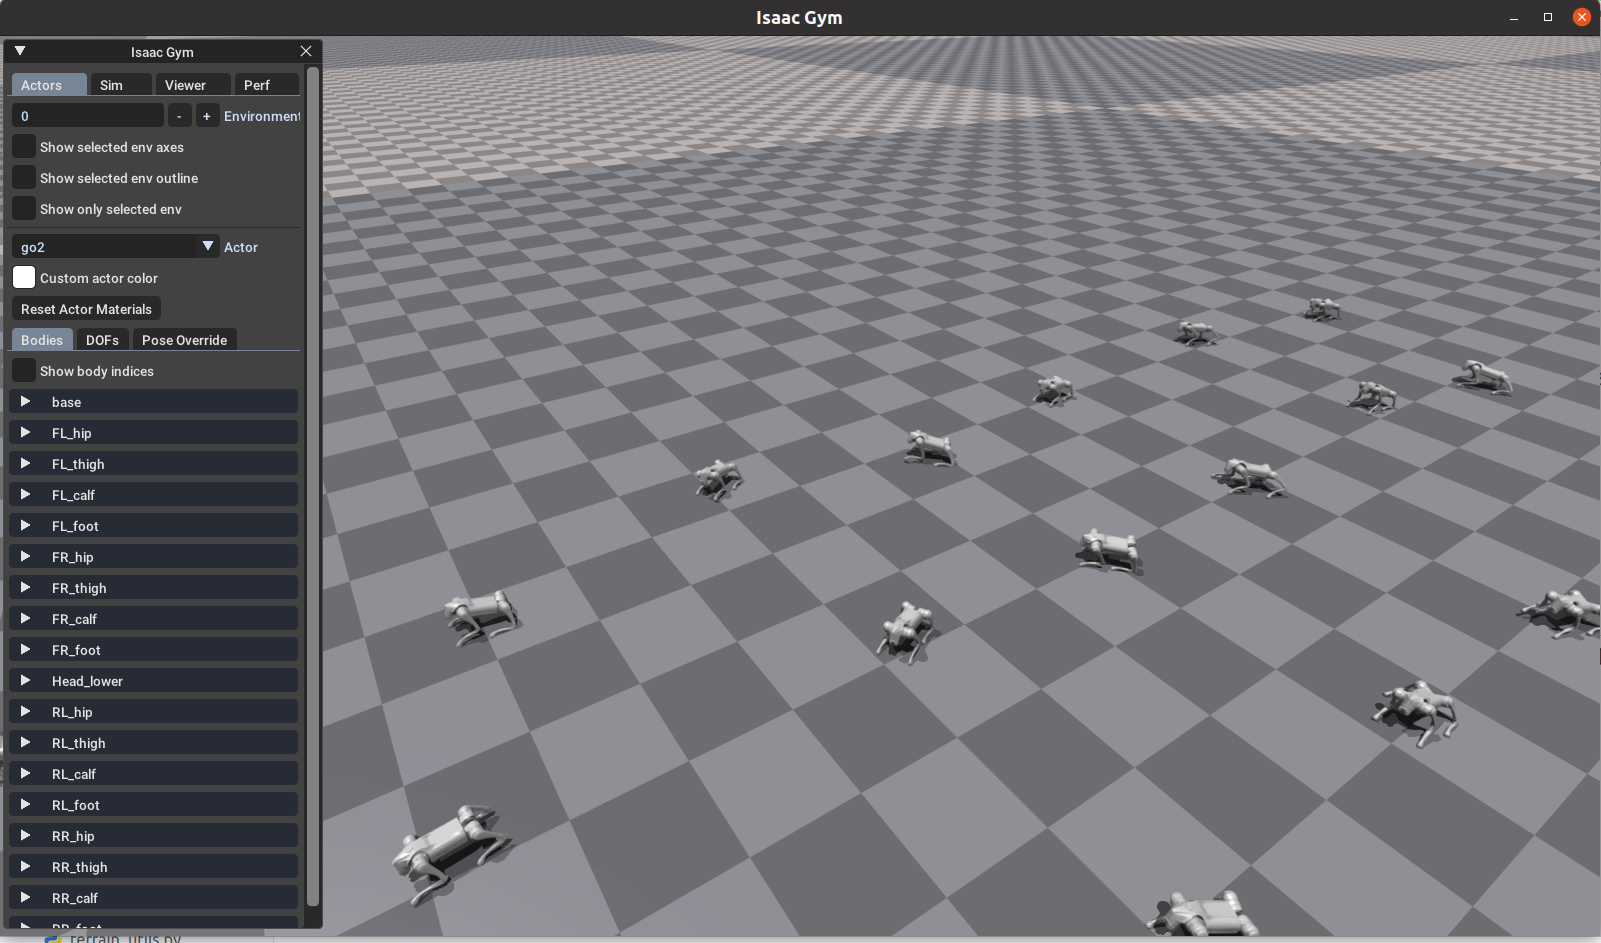
python legged_gym/scripts/train.py --task=go2 --num_envs=100
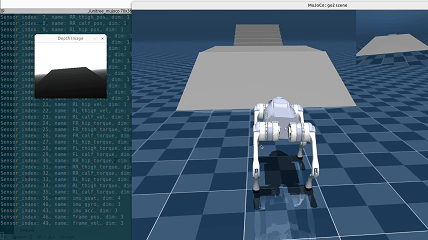
If a window like below appears, the installation is successful.
Genesis#
# 1. Create a conda environment with python3.10
conda create -n lr_gen python=3.10
conda activate lr_gen
# 2. Install Pytorch
pip install torch==2.8.0 torchvision==0.23.0 torchaudio==2.8.0 --index-url https://download.pytorch.org/whl/cu126
# 3. Install LeggedGym-Ex with genesis
git clone https://github.com/lupinjia/LeggedGym-Ex.git
cd LeggedGym-Ex && pip install -e ".[genesis]"
# 4. Test the installation
export SIMULATOR=genesis
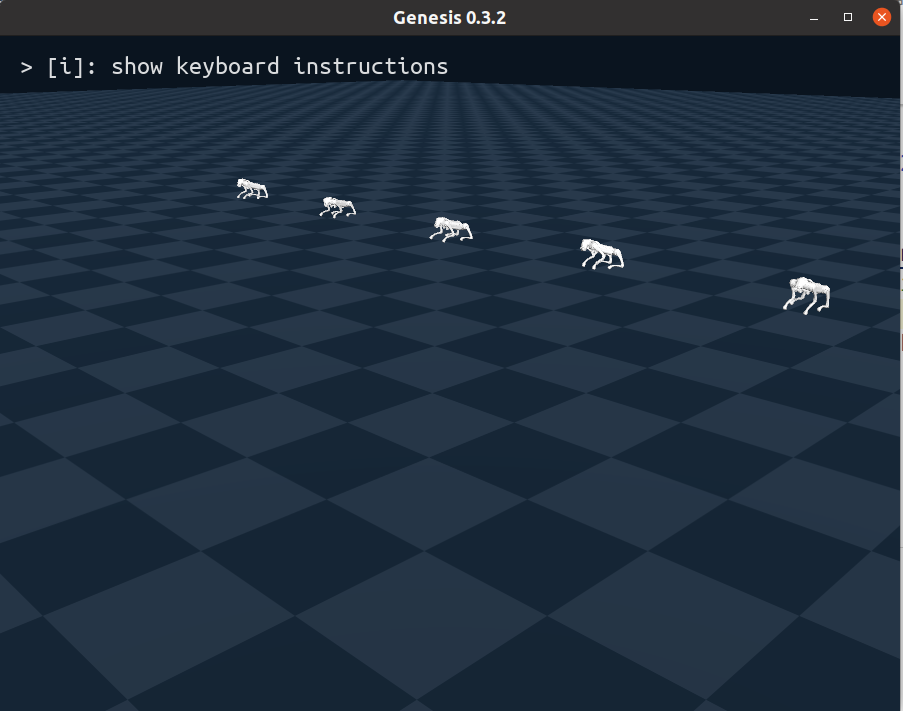
python legged_gym/scripts/train.py --task=go2 --num_envs=100
If a window like below appears, the installation is successful.
IsaacSim#
# 1. Create a conda environment with python3.11
conda create -n lr_lab python=3.11
conda activate lr_lab
# 2. Install IsaacSim
pip install --upgrade "isaacsim[all,extscache]==5.1.0" --extra-index-url https://pypi.nvidia.com
# 3. Verify IsaacSim Installation
isaacsim # If a window appears, then it is successful
# 4. Clone and install isaaclab
git clone https://github.com/isaac-sim/IsaacLab.git && cd IsaacLab && git checkout v2.3.2
./isaaclab.sh --install none # do not install rl lib to use our custom rl library
# 5. Verify IsaacLab Installtion
python scripts/tutorials/00_sim/create_empty.py # If a windows with black scene appears, it is successful.
# 6. Install LeggedGym-Ex with IsaacLab
git clone https://github.com/lupinjia/LeggedGym-Ex.git
cd LeggedGym-Ex && pip install -e ".[isaaclab]"
# 7. Test the installation
export SIMULATOR=isaaclab
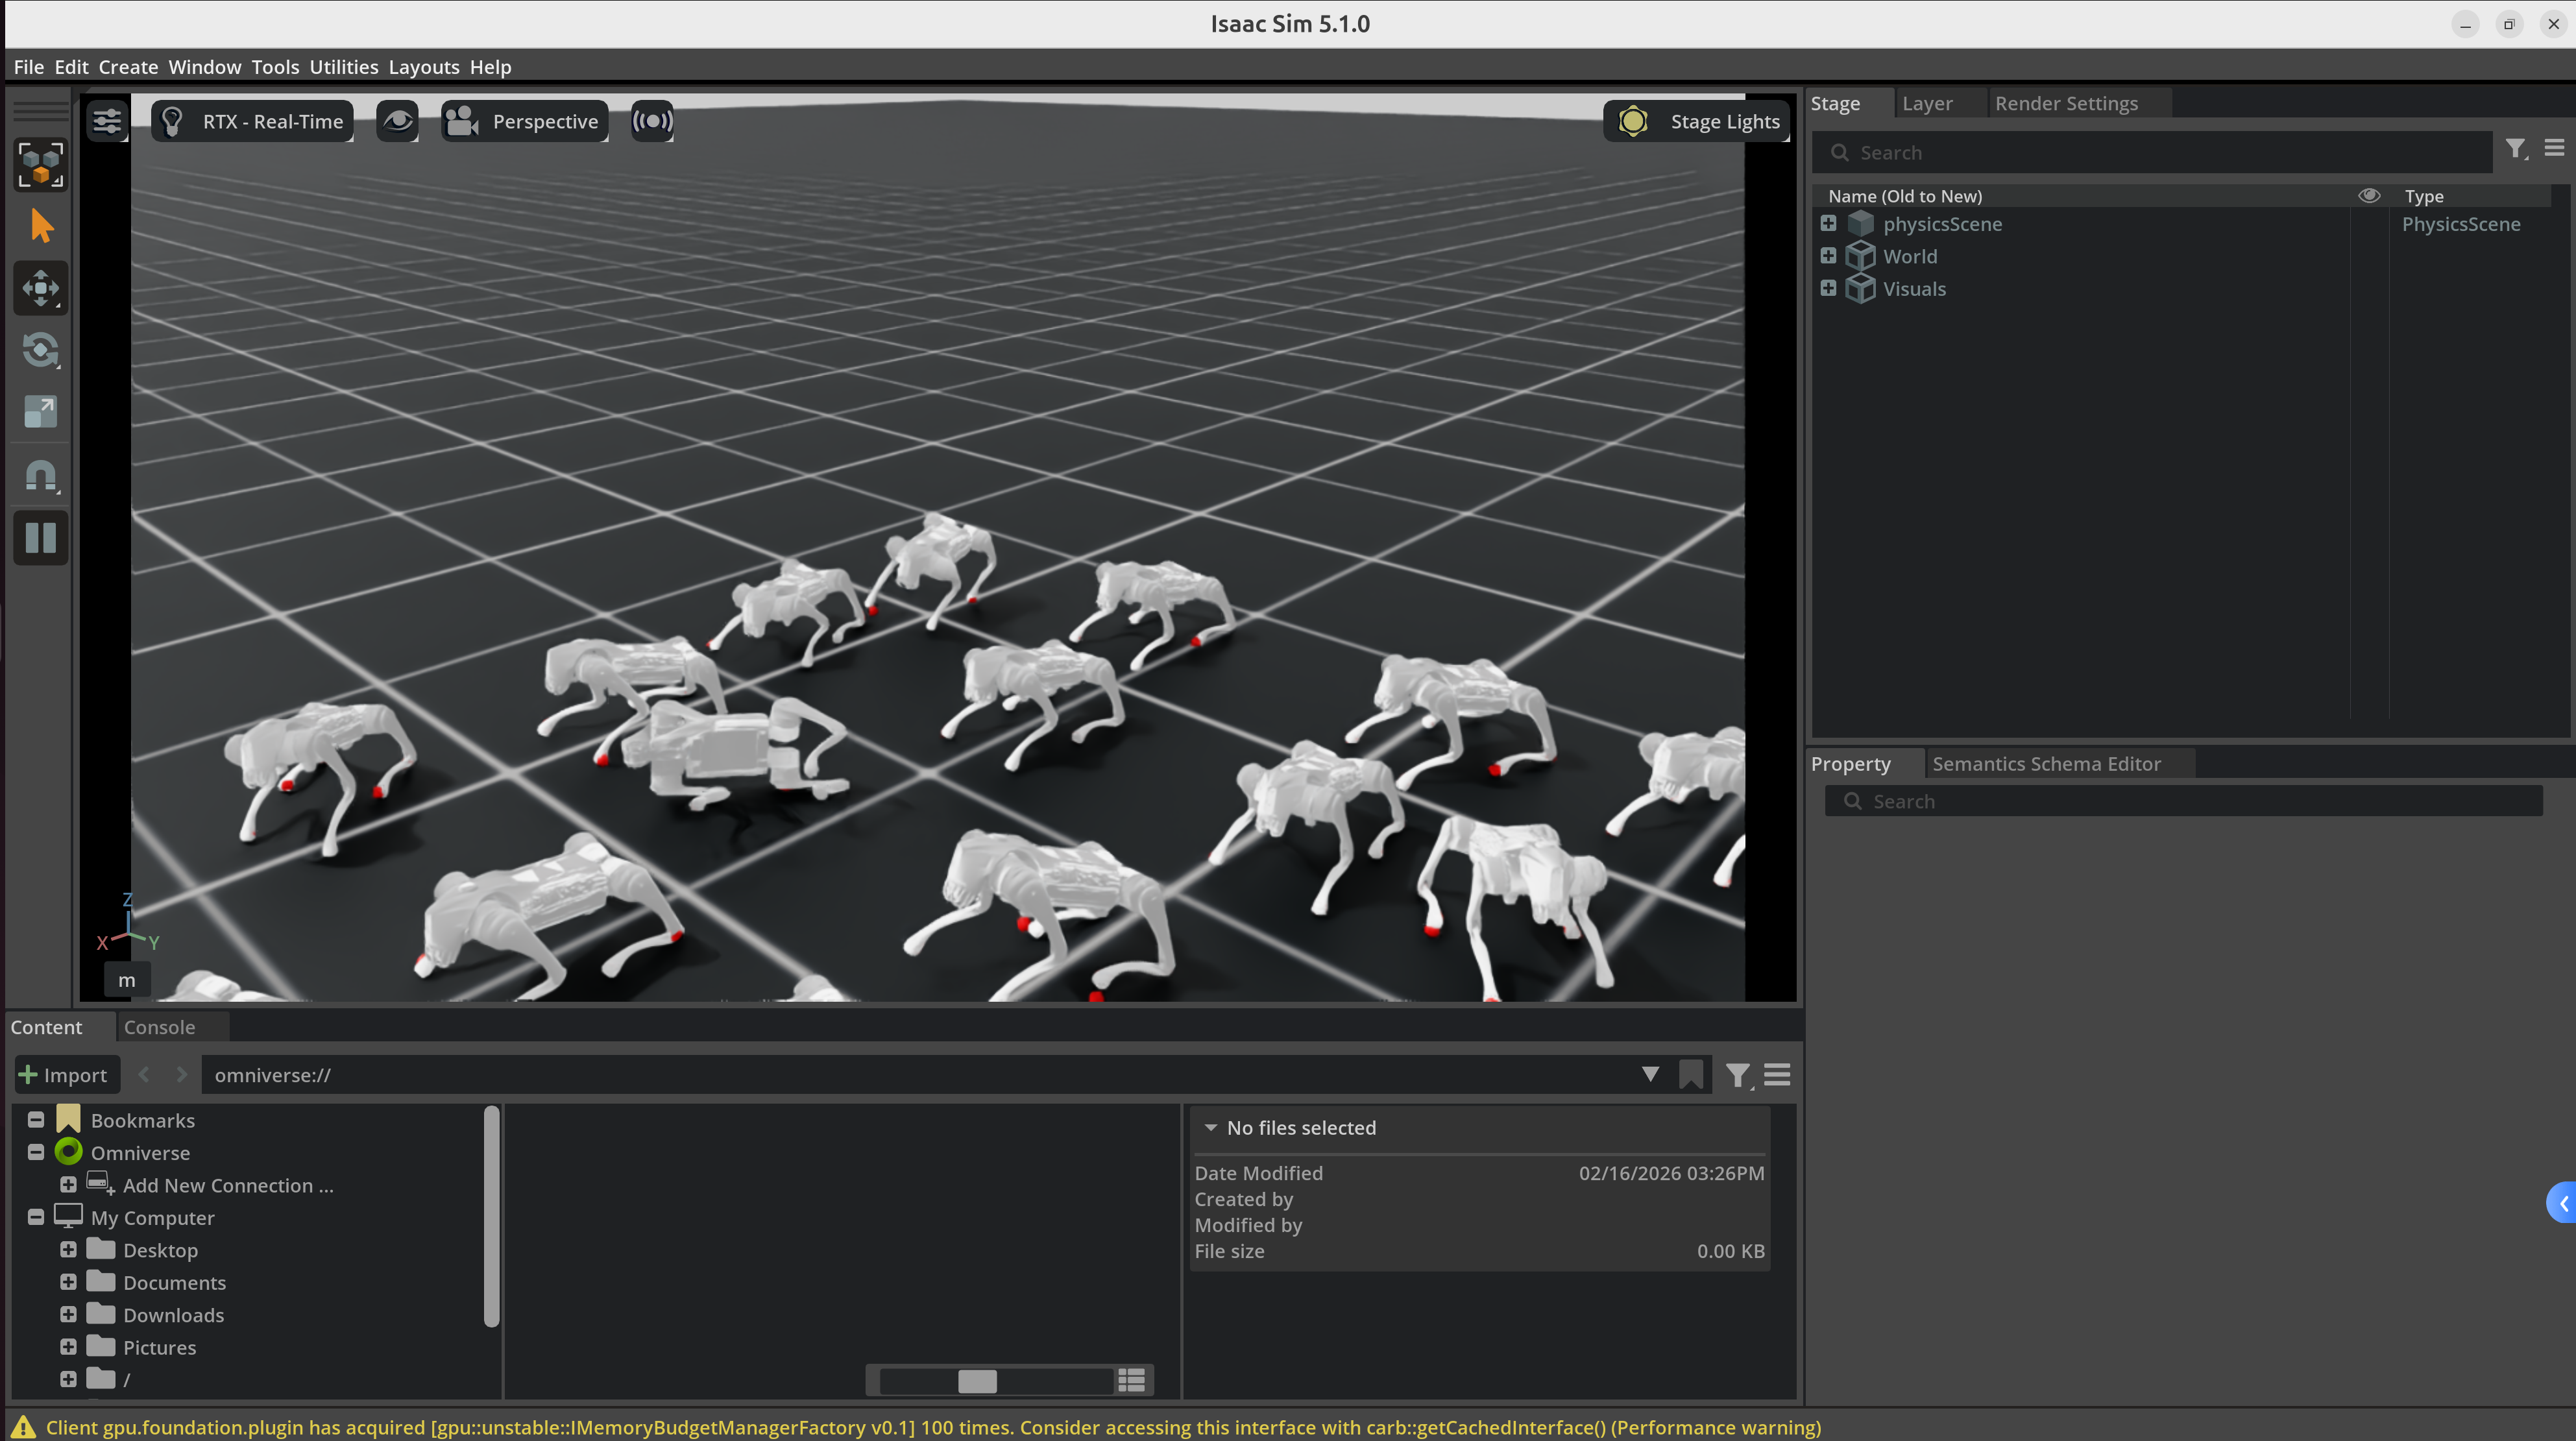
python legged_gym/scripts/train.py --task=go2 --num_envs=100
If a window like below appears, the installation is successful.
Finally, you need to register a wandb account and set the environment variable:
export WANDB_API_KEY=<your_api_key>
Using Docker#
We provide 4 dockerfiles for different scenarios:
Dockerfile |
Description |
Python |
CUDA |
PyTorch |
|---|---|---|---|---|
|
Multiple simulators |
3.8/3.10/3.11 |
12.8 |
2.4.1/2.8.0 |
|
Genesis only |
3.10 |
12.6 |
2.8.0 |
|
IsaacGym only |
3.8 |
12.6 |
2.4.1 |
|
IsaacSim/IsaacLab only |
3.11 |
12.8 |
- |
If you want lightweight container with only one simulator, then you can choose one of three single-simulator version to use.
If you want to use this framework with full simulator backend support, the multiple-simulators version is more favorable (need at least 70GB of disk).
Building the image#
Multiple Simulators#
# first download isaacgym and IsaacLab following the instructions above.
# The desired directory tree is like below:
#   ├── IsaacLab/
#   ├── isaacgym/
#   └── LeggedGym-Ex/

cd /path/to/LeggedGym-Ex
docker build -t leggedgym-ex:all -f Dockerfile ..
IsaacGym Only#
# first download isaacgym following the instructions above.
# The desired directory tree is like below:
#   ├── isaacgym/
#   └── LeggedGym-Ex/
cd /path/to/LeggedGym-Ex
docker build -t leggedgym-ex:isaacgym -f Dockerfile.isaacgym ..
Genesis Only#
docker build -t leggedgym-ex:genesis -f Dockerfile.genesis .
IsaacLab Only#
# first download IsaacLab following the instructions above.
# The desired directory tree is like below:
#   ├── IsaacLab/
#   └── LeggedGym-Ex/

docker build -t leggedgym-ex:isaaclab -f Dockerfile.isaaclab ..
Known Issues#
IsaacGym window does not show rendered physical world#
You may encounter this problem when your nvidia driver version is >= 570. To solve this, use export VK_ICD_FILENAMES=/usr/share/vulkan/icd.d/nvidia_icd.json.
IsaacGym uses Vulkan to render graphics. In a driver with new version, the system may not be able to find correct Vulkan ICD (Installable Client Driver) configuration file.
ModuleNotFoundError: No module named ‘pkg_resources’#
refer to https://github.com/isaac-sim/IsaacLab/issues/4576
Modify source/isaaclab/setup.py:
"flatdict==4.1.0" # change flatdict version from 4.0.1 to 4.1.0
Optional Installation#
Unitree Go2 Sim2Sim#
Deploying the policy to another simulator can effectively test the robustness of the policy. Also, the code used for sim2sim can oftern be deployed directly to the real robot. To avoid potential collapse on the real robot, it’s better to first test the deployment code in simulation.
Since deployment codes are usually written in C++, a simulator which supports C++ interface is ideal. We offer a sim2sim framework in mujoco based on unitree_sdk2, unitree_mujoco and LibTorch.
For the simulator, you can install unitree_mujoco according to the instructions in README.md.
For the deployment code, you can refer to go2_deploy and go2_deploy_python.
Below is the interface of unitree_mujoco. We have implemented depth image access and publication through dds.
TRON1_PF Sim2Sim#
For sim2sim of TRON1_PF, you can install tron1-mujoco-sim and tron1-rl-deploy-python provided by us.