⬇️Deploy to Real Robot#
In last subsection, we have briefly learned how to start a training session and play the resultant policy in the simulator. The next question is, how to deploy the policy to the real robot, interacting with the dynamics in the real world?
Preliminaries#
With the knowledge of Reinforcement Learning\(^{1,2}\), we know that we want to find an agent \(\pi\) that can maximize the discounted accumulative reward. The agent is represented by a neural network which outputs actions based on the observation. In the simplest setup, the observation usually consists of base angular velocities, base orientation, velocity commands, joint angles, joint angular velocities and actions of last timestep. Though you may have seen base linear velocities in legged_robot.py (code block below), this information can not be obtained directly through sensors on the robot.
self.obs_buf = torch.cat((self.simulator.base_lin_vel * self.obs_scales.lin_vel,                    # 3
                            self.simulator.base_ang_vel * self.obs_scales.ang_vel,                   # 3
                            self.simulator.projected_gravity,                                         # 3
                            self.commands[:, :3] * self.commands_scale,                   # 3
                            (self.simulator.dof_pos - self.simulator.default_dof_pos)
                                      * self.obs_scales.dof_pos, # num_dofs
                            self.simulator.dof_vel * self.obs_scales.dof_vel,                         # num_dofs
                            self.actions                                                    # num_actions
                            ), dim=-1)
Typically, sensors mounted on the robot include Inertial Measurement Unit (IMU) and joint encoders. Through IMU, we can obtain base angular velocities and base orientation (converted to projected_gravity above). Joint angles and joint angular velocities can be accessed via joint encoders.
To obtain base linear velocities, we need to conduct estimation based on other sensors using methods like Kalman Filter or estimator network (which will be explained afterwardsafter). Here we focus on exploiting other available information to make the robot walk successfully.
Modify Observations#
To deploy the policy to the real robot, we need to make sure that observations are all available in the real robot. So we need to delete base_lin_vel from obs and train a new policy.
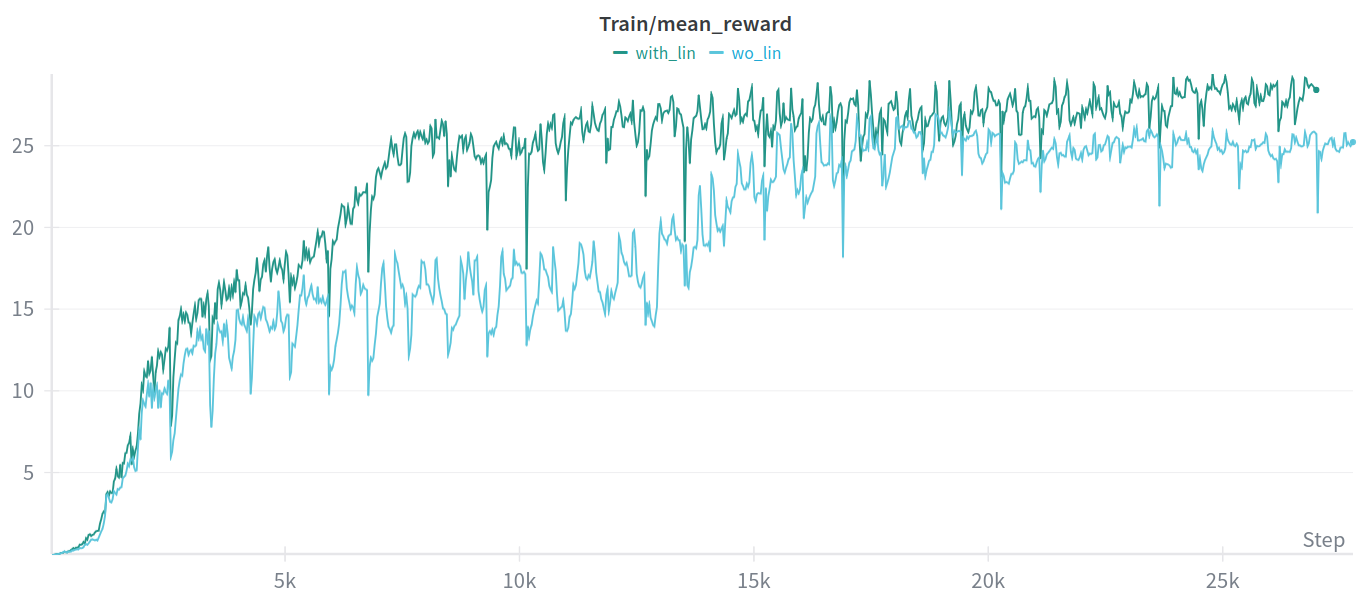
To see the reward curves and loss curves, you can utilize tensorboard or wandb. By appending --sync_wandb after python train.py, the training data will be syncronized to wandb on the cloud. Comparing the session with base_lin_vel and without it, you may find that the reward curves of the one without base_lin_vel rises slower and even drops at the end of the training. That’s mainly due to the lack of information.
Sim2Sim in Mujoco#
Before deploying to the real robot, it’s better to deploy the policy to another simulator. In this way, you can test your policy’s robustness and avoid potential collapse on the real robot. To use this feature, you need to first install go2_deploy following the instructions in Installation.
After executing play.py, you will find a folder named exported in the training session directory. Under this directory, you will find a JIT script file (.pt) which can be deployed.
Essentially, what the deployment code does is to align the input and output of the control policy. For input, you need to put the feedback information just the same as your training code. For output, you need to align the response of the real electric motor with that in the simulation.
We have provided a SimpleRLController in go2_deploy for you to deploy this simplest control policy, execute the following command after compiling:
# Under go2_deploy/build
./go2_deploy simple_rl

# Under go2_deploy/unitree_mujoco/simulate/build
./unitree_mujoco
Here is the demo video for the locomotion:
You can see that this quadruped robot can walk as our desired velocity commands, which are specified through the joystick. But this policy is just a simplest version, it struggles with external disturbances and complex terrains.
Deploy to Real Robot#
To deploy the a real go2 robot, you need to modify the network interface for the program. Check you ethernet interface through ifconfig:
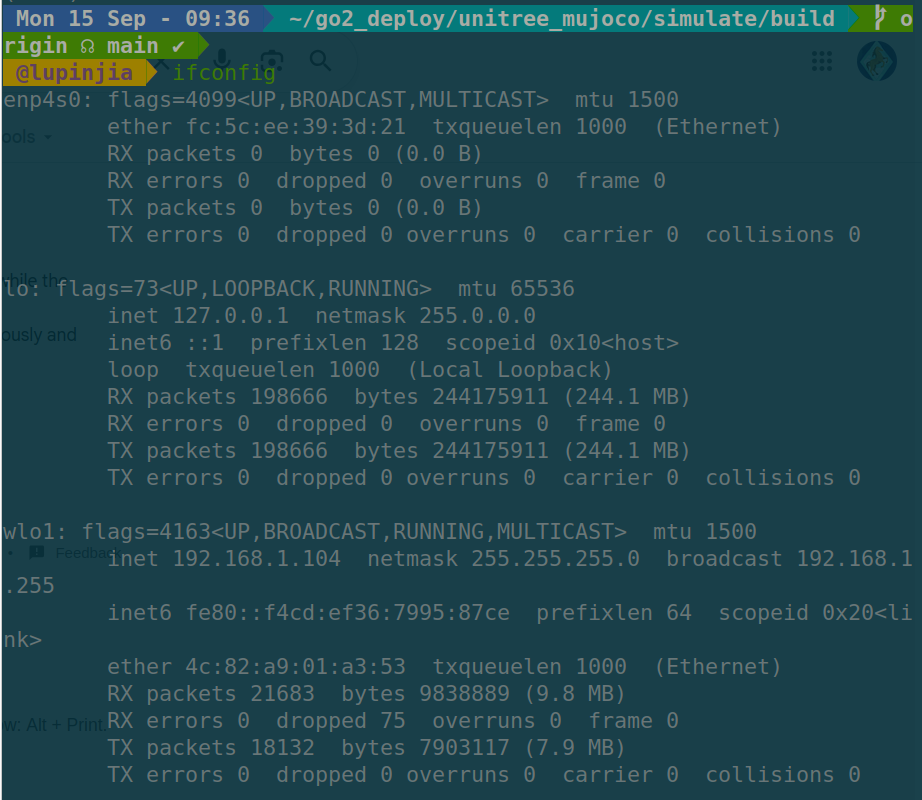
We can see that the ethernet interface of this PC is enp4s0. Then we can connect this PC with go2 through ethernet and execute:
./go2_deploy simple_rl enp4s0
You will see the robot locomotes in a way that is not so different from the simulation.